

Light up Shaded Paths Without Sacrificing Style
Solar path lights sound perfect for a Braselton backyard. No wires, no trenching, just set them in the ground and enjoy soft light along your walkways. In wide open sun, that can work pretty well. In a shaded backyard with big trees and cozy corners, things get a lot more tricky.
Many homeowners find that store-bought solar lights look bright on the box, then turn into tiny glow sticks once they go into real dirt and real shade. Paths still feel dark, steps are hard to see, and lights fade out before the evening is over. That is frustrating, and it can also be unsafe.
In this article, we will walk through how solar outdoor lighting in Braselton, GA really behaves in shaded yards, how to place and space fixtures so they work their best, and when it makes sense to think about a professionally designed solar or low-voltage lighting system instead.
How Solar Path Lights Really Work in Shaded Yards
Solar path lights are simple on the outside but picky on the inside. Each fixture usually includes:
- A small solar panel on top
- A rechargeable battery inside
- An LED light
- A photocell that tells the light when it is dark
For that battery to fill up each day, the panel needs several hours of direct sunlight. Not “it looks kind of bright out,” but actual sun hitting the panel, not blocked by trees, roofs, or fences. Without this, the battery never gets to a full charge, so the light will be dimmer and shut off earlier at night.
In Braselton, we see a lot of backyards with:
- Tall pines and hardwood trees
- Thick privacy hedges
- Deep roof overhangs
All of these cast long shadows, especially on the north-facing side of a home. A fixture that looks like it is in a pretty bright area may only get small pockets of real sun each day. On top of that, the sun angle changes through the year. Longer summer days help solar charging, but shorter winter days give panels less time to refill.
Georgia’s weather adds a few more challenges:
- Cloudy or stormy stretches that cut charging time
- Pollen coating panels in a yellow film
- Leaves, acorns, and debris sitting on top of fixtures
If panels are dirty or shaded, you do not get the light output you hoped for. Many homeowners assume the light is “broken” when it is really just undercharged.
Smart Placement Strategies for Shaded Pathways
If you want to try solar along a shaded path, placement matters more than anything. You may not be able to change where your walkway is, but you can be smart about where each light goes.
Start with your most important safety zones:
- Steps and stairs
- Any sudden drop or rise in the path
- Tight curves where footing is hard to judge
- The area where your driveway meets your front or back entry
Give these spots your best fixtures and your best sunlight. Even if the rest of the path is more softly lit, you want these key points as bright and clear as possible.
Next, look for partial sun instead of deep shade. Helpful tricks include:
- Pushing lights just outside thick tree canopies when you can
- Angling the solar panel toward the sunniest part of the sky
- Staggering fixtures along the edges of shadows instead of right in the darkest areas
You will often get better results placing a light a few feet off the path in a sunnier patch than right next to the stones under heavy shade.
You can also get more impact by using your yard to help bounce light. For example, solar path lights often look brighter when placed next to:
- Light-colored pavers or stone
- Pale gravel or mulch
- Low walls or borders that catch and reflect light
The reflected glow can soften shadows and make each fixture feel stronger without adding more lights.
Getting Path Light Spacing Right for Real-World Use
Many solar light boxes show a neat little diagram that suggests spacing fixtures 5 to 7 feet apart. In real shaded Braselton backyards, that often leaves dark holes between lights, especially if the fixtures are not at full power each night.
A better approach is to treat spacing as flexible, not fixed. Think about:
- Closer spacing in shaded stretches and around steps
- Wider spacing in brighter, open areas
- Tighter grouping on curves or intersections where direction changes
Before you commit, give your layout a quick “test drive.” Set the lights in the ground loosely without pressing them in all the way. Wait until dark, then walk the path as you normally would. Watch for:
- Spots where your feet feel hard to see
- Sudden bright-dark-bright patches
- Areas where light beams overlap too much and feel harsh
Adjust a foot or two at a time. A small shift can smooth out the pattern. To avoid a harsh “runway” look, try not to line up all lights on one side at perfect intervals. Instead:
- Alternate lights from one side of the path to the other
- Nudge fixtures in or out around plants or rocks
- Aim for gentle, overlapping pools of light instead of sharp circles
The goal is safe footing and a relaxed, welcoming feel instead of a stiff row of spotlights.
Solar Outdoor Lighting in Braselton, GA vs. Low-Voltage
Solar fixtures can be a good fit for sunny garden edges, pool fences, or wide open lawn paths. In heavily shaded areas, they often struggle to give the strength and consistency most homeowners want. This is where low-voltage LED systems start to stand out.
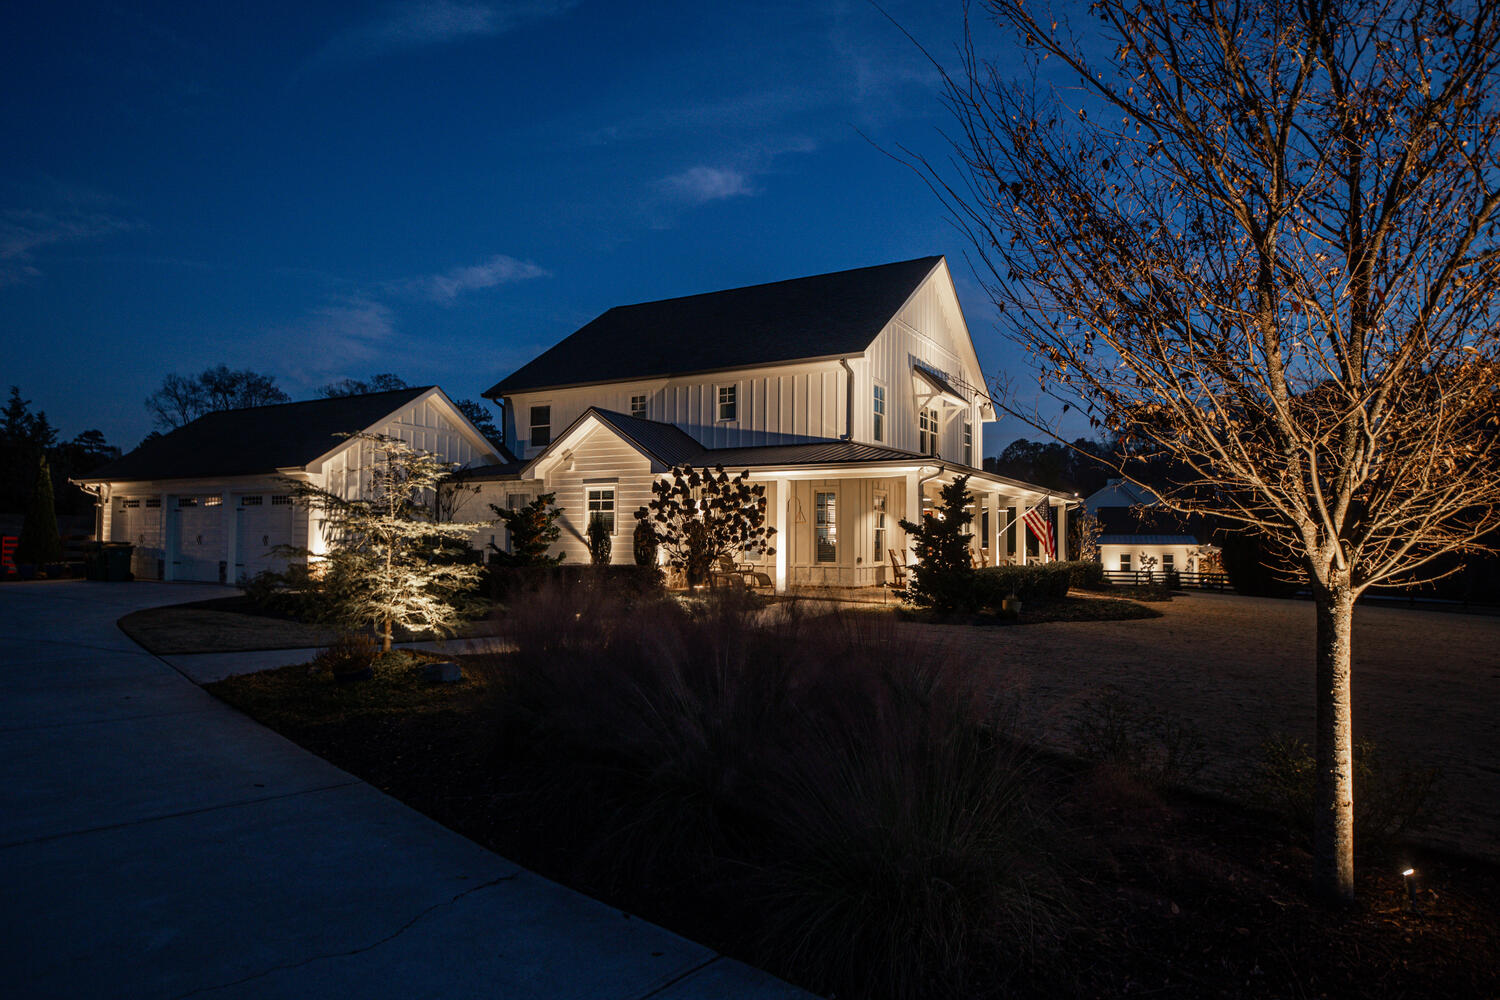
Low-voltage lighting draws power from a transformer instead of the sun, so it is not affected as much by cloudy stretches or shorter days. The light level stays much more steady from evening to evening. Professionally selected LED fixtures can give stronger brightness, more precise beam control, and more consistent color than most consumer solar options.
A lot of properties do best with a blended plan, such as:
- Solar path lights in open, sunny beds or near the street
- Low-voltage fixtures along shaded walkways and steps
- Accent lighting on trees and architecture that ties everything together
A custom system also tends to last longer, with better-quality fixtures and connections made to handle our heat, humidity, and storms.
When to Upgrade From DIY Solar to Pro Design
So how do you know when it is time to move beyond basic solar path lights in your shaded backyard? Some common signs are easy to spot:
- Dark or uneven lighting on steps and slopes
- Lights that fade out before guests are ready to head home
- Fixtures that lean, twist, or drift out of place over time
- A mix of styles and colors that distracts from your landscaping
When that happens, it is usually not your yard that is the problem. The setup just is not matched to the shade patterns and daily use of your space.
A professional outdoor lighting design, like the ones we create at Outdoor Lighting Perspectives of Atlanta, starts with how you actually live in your yard. We look at your trees, your home’s layout, your favorite paths, and your safety needs. Then we place each fixture where it can do the most good, choose the right type of light for each area, and balance solar options with low-voltage where it makes sense.
The result is a path system that feels comfortable and looks inviting, night after night, instead of a guessing game of which solar lights will work that evening.
Get Started With Your Project Today
Transform your evenings with professionally designed solar outdoor lighting in Braselton, GA tailored to your home and lifestyle. At Outdoor Lighting Perspectives of Atlanta, we take care of everything from design to installation so you can simply enjoy a beautifully illuminated property. Share your goals and ideas with our team, and we will recommend a custom lighting plan that fits your space. To schedule a consultation or ask questions, just contact us.